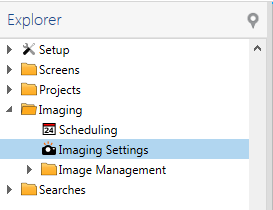
Imaging Settingscontain imaging instructions about when and how to image an experiment plate. This topic explains how to create a new imaging setting.

Imaging Settings

Add Imaging Settings
| Title | Options |
|---|---|
| Leveling Mode | Off
No window leveling will be applied. |
| Manual
The Manual mode lets you set the leveling window manually by defining its lower and upper level limits. The Lower level limit of leveling window defines the boundary below which all tonal values will be discarded from the image. The Upper level limit defines the boundary above which all tonal values will be discarded from the image. | |
| Auto
The Auto mode automatically sets the leveling window according to low and high thresholds. The Low threshold is the percentage of pixels omitted at the left side of the image histogram before setting the lower limit of the tonal range. The High threshold is the percentage of pixels omitted at the right side of the image histogram after setting the upper limit of the tonal range. Auto-leveling has following two modes. Apply per drop applies window leveling to each image according to image’s own histogram. Apply per inspection applies window leveling to each image according to aggregate histogram of images currently being shown. This keeps the relative contrast the same between images currently being shown. |
You can enable or disable imaging settings by selecting or clearing the check boxes in the Enabled column from the Imaging Settings node in the Imaging folder on the Explorer. Once an Imaging Setting has been disabled, it will not display as an option on the Experiment page when you are defining the Image Schedule.

Imaging Setting Name
When you add a new imager, you can define several different fields. Some of these fields will show up for certain imagers, some will not.
 | |
| RMC-V35R015 |